MSBuild 4.0 Custom Task Walkabout Part 2
MSBuild from .xaml
Now I'll turn to the new Windows Workflow process for controlling and configuring Team Builds. There are three default process templates available within
a newly created Team Project, all stored in the $(TeamProject)/BuildProcessTemplates directory. The most important one for this walkabout is
named DefaultTemplate.xaml, where there are also templates for projects upgraded from TFS 2008 (UpgradeTemplate.xaml) and for VS 2010 Lab Manager
(LabDefaultTemplate.xaml). DefaultTemplate.xaml is used for any standard Team Project created in TFS 2010 and instead of editing the base file, any
customization should take place on a copy of the original .xaml. Should the original file get modified by mistake, one could presumably grab an untouched
version from another Team Project, or simply roll-back in TFS. The documented way to go about making the copy involves working from the Build Definition
configuration dialog, wich can be accessed by right-clicking on the desired build def in the Team Explorer window and selecting 'Edit Build Definition'.
The area we need to look at is located toward the top of the Process pane, where current Build process template is defined. On the right side is
a little down-chevron that will 'Show Details' when clicked:
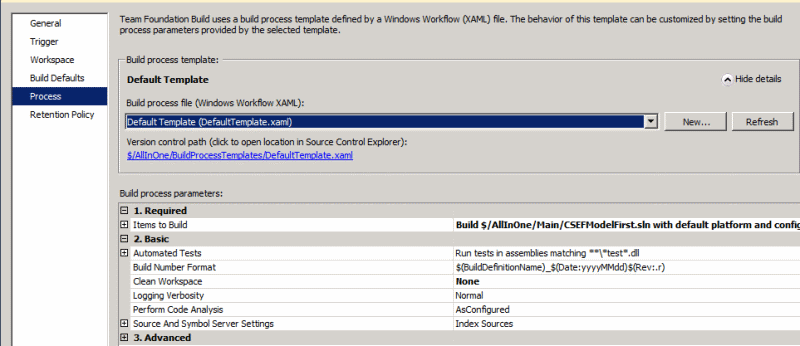
Here we can see that the current Build Definition will use DefaultTemplate.xaml at build time. What I want to do is click the New... button and provide
a new file name:
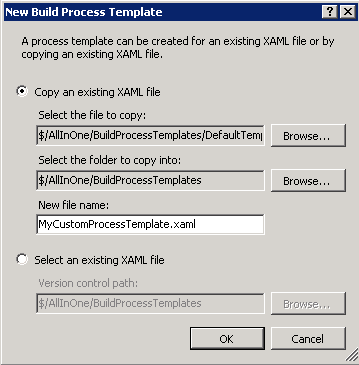
As the screenshot shows, this new template is going get the awe-inspiring name of MyCustomProcessTemplate.xaml, will be based off of DefaultTemplate.xaml,
and be copied into standard /BuildProcessTemplates folder. Once the new file is available in the Source Control Explorer, Get Latest, double-click to open, wait a few
moments for it to load, and:
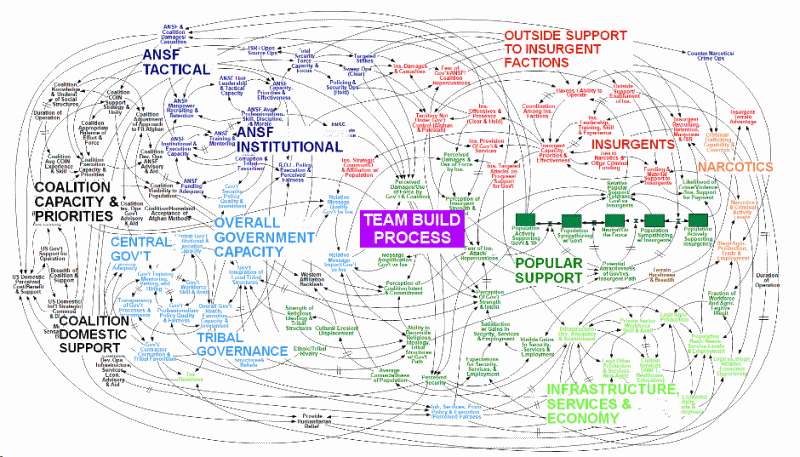
OK, maybe not quite that bad. But maybe so. Either way, the Workflow display for the default process template is rather intimidating at first. I navigate down
to one of the relatively major containers, where the display name is 'If BuildSettings.HasProjectsToBuild', the navigation breadcrumb for which (top of window)
looks like below:

(Hint: if a dual monitor display is present the easiest thing to do going forward is to Float the tab for the .xaml file and maximize - either drag and
drop to the second display
or right-click on the tab name and select Float from the context menu.) Double-clicking yellow 'title bar' for the named section focuses in on that parent
container and makes it a lot easier to understand the compile-project part of the workflow. Double-click again, now on the inner sequence named
'Compile the Project' and get ready to modify:
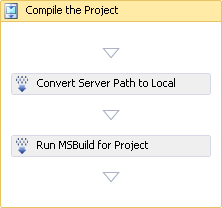
First step will be to select the 'If' control from the Toolbox, located within the Control Flow grouping:
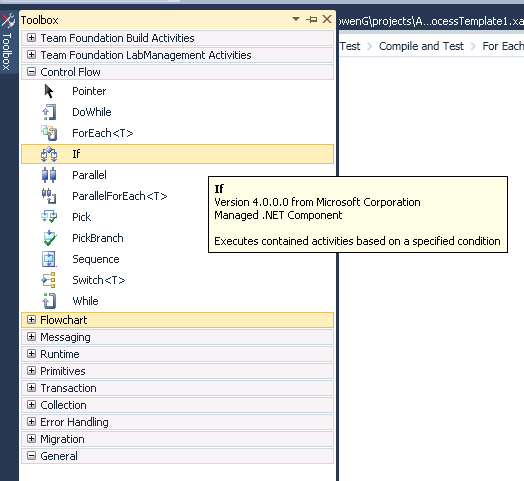
Click and drag it onto the workflow, to a spot just below the 'Run MSBuild for Project' activity:
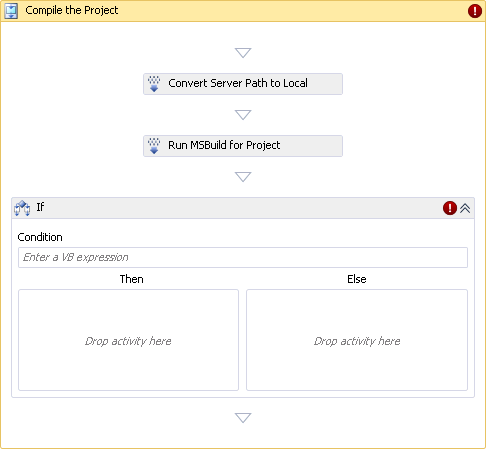
Note the error icon displaying in the upper-right corner of the container - right now it is simply indicating that there is no value entered into the
Condition property. The same icon will appear on all parent controls until the error in question has been correct. Click on the Condtion textbox within
the workflow and the following statement, 'BuildDetail.CompilationStatus != BuildPhaseStatus.Failed'.
Typing in that text works well enough in my environment, where there is plenty of room within the Workflow designer. For other
controls it will often be easier to move to the Properties window once the correct panel is highlighted in the Workflow designer and enter the text there - or
in the Expression Editor pop-up that can display when you need more room. Once the new code has been entered, wait a few moments for the error icons to go
away... but they don't. Hover on the icon and see error details:'Identifier expected'. Ah yes, as is indicated right there in the designer,
the code needs to be in Visual Basic, C# need not apply here.
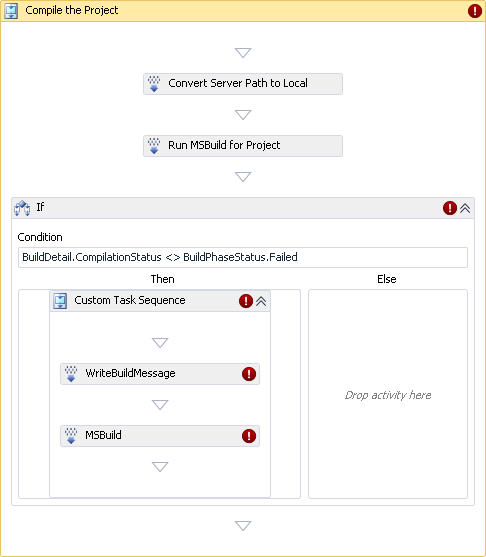
Reconfigure as 'BuildDetail.CompilationStatus <> BuildPhaseStatus.Failed' and error clears.
Why here, why that condition?There are other locations in the overall sequence that perhaps would serve better for the calling of this
particular custom task but there are two reasons for inserting it at this point in the workflow. The first reason is more or less happenstance, where
this is the spot in which I began experimenting and it proved 'good enough'. The second reason relates to the idea
that I want to produce the manifest whenever there is a successful compilation of the binaries, even if the build as a whole Fails. Once there are binaries
present on the build server, we should accept that they may make it out into the wild somehow, even if that wild only involves a local QA environment. And
this ties into the particular Condition used, where the CompilationStatus at this point will likely be .Unknown and checking
instead that it is = Succeeded won't help. From what I can tell, status will only be set to Suceeded later on in the workflow,
once associated items like Unit Tests have passed also (all depends on what factors go into failing/passing a given build). In terms of overall sequencing,
another thing to realize is that the 'Compile the Project' sequence is within a loop that iterates through all the projects to be built. Right now I'm
testing with a solution containing only a single project, meaning there is only one pass. If multiple projects are being built, the location I've chosen
will cause the Custom Task to be called multiple times, which is less than perfect. Even so, the final pass in that scenario does indeed produce the
desired hashManifest.txt. |
|
|
|
For current purposes, the 'Else' branch (build status = Failed) is irrelevant and the 'Then' container will be the focus of attention. In theory I could
simply add an MSBuild activity directly into the 'Then' container but that would prove somewhat limiting going forward. Instead, I go back to the Control Flow
grouping in the Toolbox and drag a Sequence control over to 'Then' and change the DisplayName to 'Custom Task Sequence' to help it stand out.
With that Sequence in place I can add multiple child controls at this point in the workflow, instead of being constrained to only a single (MSBuild) activity.
Especially useful will be the ability to write info to a logfile,
as a debugging aide. Back to Toolbox and add two controls from the 'Team Foundation Build Activities' section - WriteBuildMessage and MSBuild - to 'Custom
Task Sequence':
Next, Configuring Activity Properties...